Introduction:
This article explains how to set up the necessary API roles and clients in Jamf Pro and connect your Jamf Pro environment to Senturo. Completing these steps allows Senturo to integrate with your device management workflows.
Prerequisites
Before you begin, make sure you have:
-
Access to your Jamf Pro API
-
Devices running iOS 13 or later
Steps to Connect Your Jamf Pro Instance to Senturo
1. Create API Roles and Clients
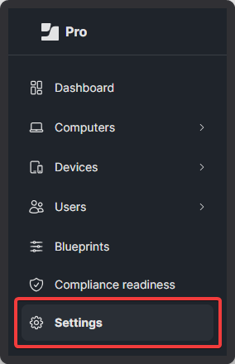
- In Jamf Pro, click Settings in the sidebar.
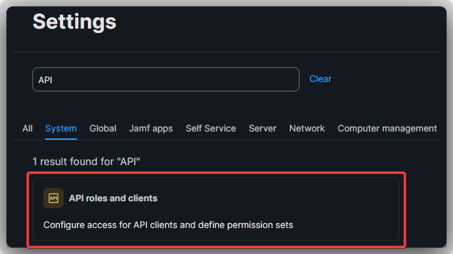
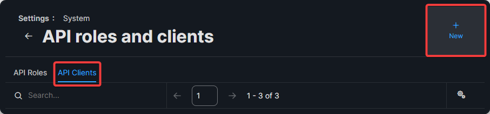
- Under System, select API Roles and Clients.
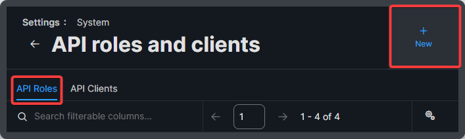
- Click the API Roles tab, then click New.
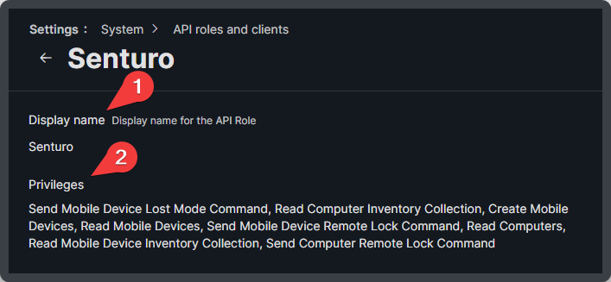
- Enter a display name for the API role.
-
In the API role privileges field, add the following required privileges:
-
Send Mobile Device Lost Mode Command
-
Read Computer Inventory Collection
-
Create Mobile Devices
-
Read Mobile Devices
-
Send Mobile Device Remote Lock Command
-
Read Computers
-
Read Mobile Device Inventory Collection
- Send Computer Remote Lock Command
-
-
Click Save.
-
Navigate to the API Clients tab and click New.
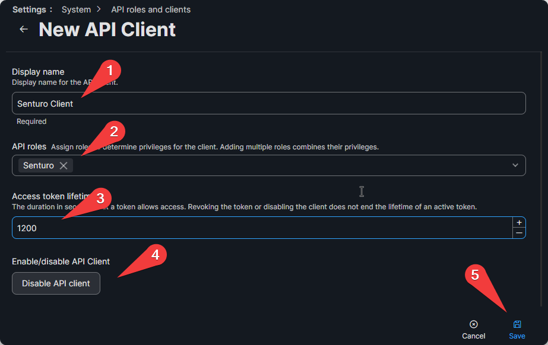
- Enter a display name for the API client.
-
Assign the API role you created earlier.
-
Set the Access Token Lifetime to 1200.
-
Enable the API client.
-
Click Save.
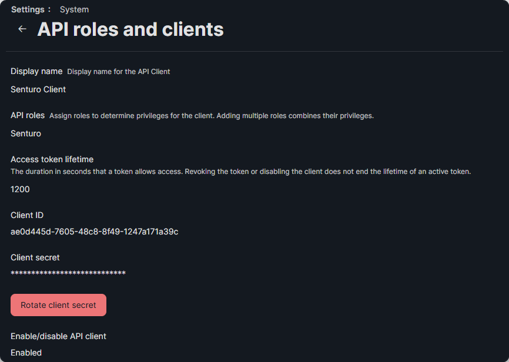
2. Copy Client ID and Client Secret into Senturo
- In Jamf Pro, click Generate client secret, then Create secret.
- Copy the Client ID and Client Secret immediately and save them securely.
3. Connect Jamf Pro to Senturo
-
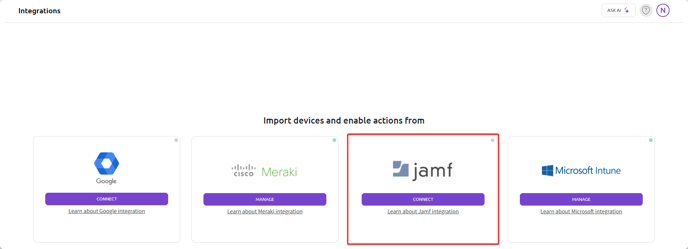
Navigate to the Integrations page in Senturo.
-
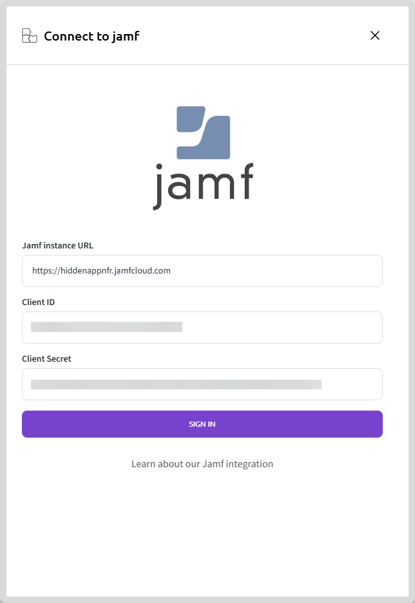
Click Connect under the Jamf integration.
- Enter your Jamf Instance URL, Client ID, and Client Secret.
-
Click Sign In to complete the connection.
Conclusion
Setting up Jamf Pro integration with Senturo enables secure device management and centralized control over your iOS fleet. By correctly configuring the API roles, clients, and connection settings, you create a secure and reliable link between Jamf and Senturo that powers device monitoring, security actions, and app deployments.
FAQs
Q: What should I do if my connection to Jamf fails during setup?
A: Double-check that your Client ID, Client Secret, and Jamf Instance URL are correct. Also ensure that the API role has the required privileges listed in this guide.
Q: Can I edit the API role or client later if needed?
A: Yes, you can update API roles and clients in Jamf Pro at any time if access requirements change. Be cautious when adjusting privileges to avoid breaking the integration.
Q: Is it safe to regenerate a new client secret later?
A: Yes. If needed, you can generate a new client secret in Jamf Pro and update it in Senturo under Integrations. The connection will continue working after updating the new secret.
Q: What happens if the API role privileges are incomplete?
A: The integration may partially work or fail entirely. Always ensure all required privileges are correctly assigned during setup.